

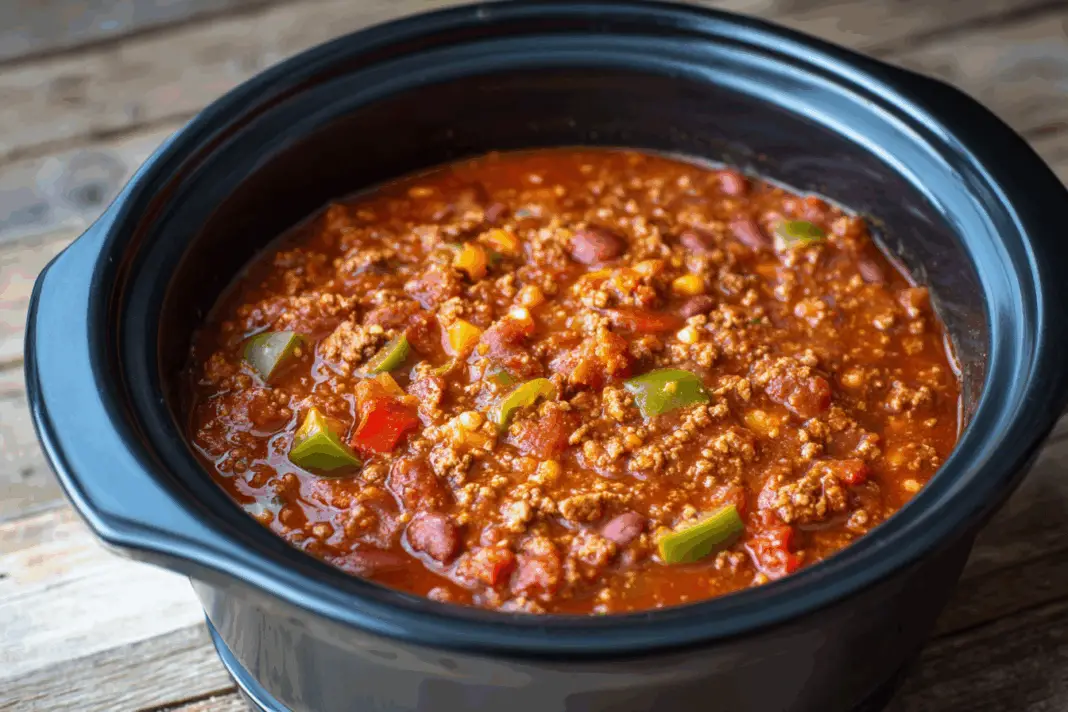
Most chili recipes promise big things but deliver bland disappointment. After testing dozens of versions, this hearty ground beef and sausage chili actually delivers on the hype. It combines the perfect balance of meat, beans, and spices in one pot, creating a rich, satisfying meal that gets better with every bite. The secret lies in a few simple techniques that most home cooks skip, turning ordinary ingredients into something extraordinary.
Most people skip the crucial vegetable foundation step
Building the base correctly makes or breaks any chili recipe. Start by heating olive oil in a large Dutch oven over medium heat, then add diced onions, bell peppers, jalapeños, and canned green chilies. Cook these vegetables until they become tender and slightly caramelized, about 8-10 minutes. This step releases natural sugars and creates a depth that raw vegetables simply cannot provide.
The aromatics should smell sweet and fragrant before moving to the next step. Adding minced garlic during the last minute prevents burning while still releasing its pungent oils. This foundation technique transforms simple vegetables into a flavor powerhouse that supports everything else in the pot. Many recipes rush this stage, but patience here pays dividends in the final result.
The meat mixture ratio changes everything about texture
Using only ground beef creates a one-dimensional chili that lacks complexity. The winning combination uses two pounds of lean ground beef paired with one pound of ground sausage. The beef provides the hearty base while the sausage adds fat content and seasoning depth that elevates the entire dish. Brown both meats together with the softened vegetables, breaking them into small, uniform pieces.
Choose 93/7 ground beef for the ideal lean-to-fat ratio without creating a greasy mess. The sausage can be spicy or mild depending on heat preference, but avoid removing all the rendered fat since it carries essential flavors. Once fully browned, drain excess grease if needed, but leave enough to maintain richness. This dual-meat approach creates layers of taste that single-protein versions cannot match.
Fire-roasted tomatoes make a noticeable difference in depth
Regular diced tomatoes work fine, but fire-roasted versions add a smoky undertone that mimics hours of slow cooking. Pour in two cans of fire-roasted diced tomatoes along with tomato paste and tomato sauce. The paste should be added directly to the meat mixture first, cooking for 2-3 minutes until it darkens and develops a sweet aroma. This caramelization process removes the raw taste and concentrates the tomato essence.
The combination of different tomato products creates complexity that single varieties cannot achieve. Diced tomatoes provide chunks and texture, paste adds thickness and intensity, while sauce brings liquid and smoothness. Some cooks substitute regular tomatoes with Rotel for extra heat, but fire-roasted varieties offer the best balance. The acid in tomatoes also helps tenderize the meat during the long simmering process ahead.
Seasoning timing affects how spices develop their punch
Adding spices at the wrong moment wastes their potential and creates flat taste. McCormick chili seasoning packets provide consistent results, but the timing matters more than the brand. Add the seasoning blend after browning the meat but before introducing liquids. This allows the spices to bloom in the fat and coat the protein directly, creating more even distribution throughout the dish.
The standard packet works for most palates, but spice lovers should choose the spicy version or supplement with additional chili powder, cumin, and paprika. Dried herbs like oregano benefit from early addition, while fresh additions like cilantro should wait until serving. Spice combinations vary widely, but the key is allowing them to cook with the fat and protein before adding liquid ingredients that dilute their impact.
Bean selection and timing prevents mushy disappointment
Using multiple bean varieties creates textural interest that single types cannot provide. Kidney beans and red chili beans work excellently together, offering different sizes and slightly different tastes. Bush’s brand kidney chili beans come pre-seasoned and hold their shape well during long cooking times. Drain and rinse the beans to remove excess sodium and starch that can make the final product overly thick.
Add beans during the final 30 minutes of cooking rather than at the beginning. Early addition turns them into mush that disappears into the sauce, while late addition preserves their integrity and bite. Some traditionalists insist that authentic chili contains no beans at all, but most home cooks appreciate the protein, fiber, and bulk that beans provide. Two cans total provides the right ratio without overwhelming the meat content.
Low and slow simmering cannot be rushed or skipped
Bringing everything to a boil then immediately reducing to low heat allows all ingredients to meld properly. Cover the pot partially, leaving some steam to escape while preventing excessive evaporation. The minimum simmering time is one hour, but two hours produces noticeably better results. Stir occasionally to prevent sticking and ensure even cooking throughout the pot.
The long cooking process allows tough meat fibers to break down, spices to penetrate deeply, and acid from tomatoes to balance the richness. Rushing this stage results in harsh, separated elements rather than a unified dish. If the mixture becomes too thick during cooking, add small amounts of beef broth or water to maintain the desired consistency. The extended simmering transforms individual ingredients into something greater than their parts.
Proper toppings turn good chili into memorable meals
Shredded sharp cheddar cheese melts beautifully into hot chili, creating creamy pockets throughout each bite. Monterey Jack offers milder taste for those who prefer subtlety. Fresh jalapeño slices add bright heat that differs from the deeper warmth of cooked spices. Avocado or guacamole provides cooling richness that balances spicy elements while adding healthy fats and creamy texture.
Fritos corn chips deliver satisfying crunch and slightly sweet corn taste that complements the savory base. Sour cream or Greek yogurt adds tangy coolness while thinning overly thick portions. Green onions provide fresh bite and color contrast against the deep red mixture. The key is offering variety so each person can customize their bowl according to personal preferences and heat tolerance.
Storage and reheating techniques preserve quality and safety
Cool completely before transferring to airtight containers for refrigerator storage up to four days. Avoid leaving at room temperature longer than two hours to prevent bacterial growth. Divide large batches into smaller containers for easier reheating and portion control. Label containers with dates since chili can look fresh longer than it actually stays safe to eat.
Freezing works excellently for up to three months when stored in freezer-safe containers or bags. Thaw overnight in the refrigerator before reheating rather than using microwave defrost settings that create uneven temperatures. Reheat on the stovetop over medium heat, adding liquid if needed to restore original consistency. Proper storage maintains food safety while preserving the complex taste development that makes homemade chili superior to canned versions.
Common mistakes that ruin otherwise perfect batches
Using pre-ground spices that have lost their potency creates flat taste no matter how much gets added. Check expiration dates and replace old seasonings before starting. Whole spices like cumin seeds can be toasted and ground fresh for maximum impact. Adding salt too early draws moisture from vegetables and meat, preventing proper browning and caramelization that builds flavor layers.
Overcrowding the pot prevents proper browning since ingredients steam instead of sear. Use a large enough vessel or brown meat in batches if necessary. Lifting the lid constantly releases heat and steam, extending cooking times while preventing proper melding. Trust the process and resist the urge to check progress every few minutes. These simple mistakes can derail an otherwise excellent recipe, so attention to technique matters as much as ingredient quality.
This chili recipe delivers everything promised without gimmicks or unusual ingredients. The combination of proper technique, quality ingredients, and patience creates a satisfying meal that improves with each reheating. Whether feeding a crowd on game day or meal prepping for busy weeknights, this version provides the comfort and richness that makes chili a cold-weather favorite.
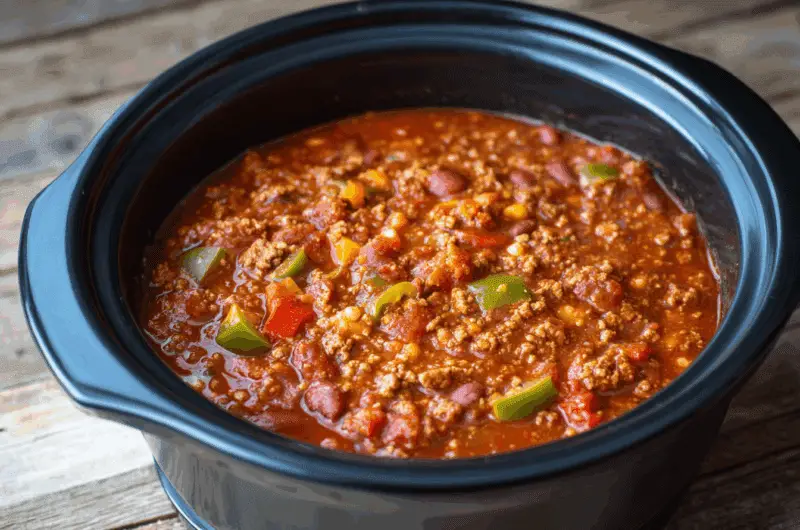
Ultimate One Pot Ground Beef and Sausage Chili
Course: Dinner8
servings10
minutes1
hour20
minutes410
kcalThis hearty, protein-packed chili combines ground beef and sausage with fire-roasted tomatoes and the perfect blend of spices for maximum comfort in every bowl.
Ingredients
1 tablespoon olive oil
2 large onions, diced
1 red bell pepper, diced
1 jalapeño, finely diced
1 can (4 oz) diced green chilies
3 tablespoons minced garlic
2 pounds ground beef (93/7 blend)
1 pound ground sausage
1 packet (1 oz) McCormick chili seasoning
1 can (6 oz) tomato paste
2 cans (14.5 oz each) fire-roasted diced tomatoes
1 can (15 oz) tomato sauce
1 can (16 oz) kidney chili beans, drained and rinsed
1 can (16 oz) red chili beans, drained and rinsed
Directions
- Heat olive oil in a large Dutch oven or heavy-bottomed pot over medium heat until shimmering. Add diced onions, bell pepper, jalapeño, and green chilies to the hot oil. Cook the vegetables, stirring occasionally, until they become tender, fragrant, and slightly caramelized, about 8-10 minutes. Add minced garlic during the last minute to prevent burning while releasing its aromatic oils.
- Add ground beef and ground sausage to the pot with the softened vegetables. Break up the meat with a wooden spoon as it cooks, ensuring there are no large chunks remaining. Cook, stirring occasionally, until the meat is fully browned and no longer pink, about 10-12 minutes. If there is excessive grease, drain some but leave enough fat to maintain rich taste.
- Stir the chili seasoning packet into the browned meat mixture, coating everything evenly. Push the meat to one side of the pot and add tomato paste to the cleared space. Cook the tomato paste, stirring frequently, until it darkens in color and develops a sweet, caramelized aroma, about 2-3 minutes. This step removes the raw taste and concentrates the tomato essence.
- Pour in the fire-roasted diced tomatoes with their juice, tomato sauce, and mix everything together thoroughly. The fire-roasted tomatoes add smoky depth while the sauce provides liquid and smooth texture. Stir well to combine all ingredients and scrape up any browned bits from the bottom of the pot for added richness.
- Bring the mixture to a low boil over medium-high heat, then immediately reduce heat to low to maintain a gentle simmer. Cover the pot partially with a lid, allowing some steam to escape while preventing excessive evaporation. Let the chili simmer for at least 1 hour, stirring occasionally to prevent sticking. For even better taste development, simmer for up to 2 hours if time permits.
- Add the drained and rinsed kidney beans and red chili beans to the pot during the final 30 minutes of cooking time. Stir gently to incorporate the beans without breaking them apart. This timing ensures the beans warm through completely while maintaining their shape and texture rather than turning mushy.
- Taste the chili and adjust seasoning as needed during the final 10 minutes of cooking. Add more chili powder for heat, a splash of beef broth if too thick, or a pinch of salt if the dish tastes flat. The longer cooking time allows all elements to meld together into a cohesive, rich-tasting final product.
- Ladle the hot chili into serving bowls and top with desired garnishes such as shredded cheese, sour cream, diced avocado, jalapeño slices, or crushed Fritos for crunch. Serve immediately while hot, or let cool completely before storing in refrigerator for up to 4 days or freezer for up to 3 months.
Notes
- For milder heat, remove seeds from jalapeño and use mild chili seasoning instead of spicy version
- Fire-roasted tomatoes can be substituted with regular diced tomatoes, but the smoky depth will be reduced
- Chili tastes even better the next day as all components continue to meld together during storage
- Ground turkey can replace ground beef for a leaner option, but increase seasoning slightly
- For thicker consistency, simmer uncovered during final 30 minutes to allow excess liquid to evaporate
Frequently asked questions about this chili recipe
Q: Can I make this chili in a slow cooker instead of on the stovetop?
A: Yes, brown the meat and vegetables first, then transfer everything to a slow cooker and cook on low for 6-8 hours or high for 3-4 hours. Add beans during the last hour of cooking.
Q: What makes this recipe different from other chili recipes?
A: The combination of ground beef and sausage creates more complex taste than single-meat versions, while fire-roasted tomatoes add smoky depth that regular tomatoes cannot provide.
Q: How can I make this chili spicier without changing the other elements?
A: Add diced serrano peppers with the jalapeños, use spicy Italian sausage instead of mild, or stir in hot sauce or cayenne pepper during the final seasoning adjustment.
Q: Can I freeze this chili and does it reheat well after freezing?
A: This chili freezes excellently for up to 3 months in airtight containers. Thaw overnight in refrigerator, then reheat on stovetop over medium heat, adding liquid if needed to restore consistency.
