

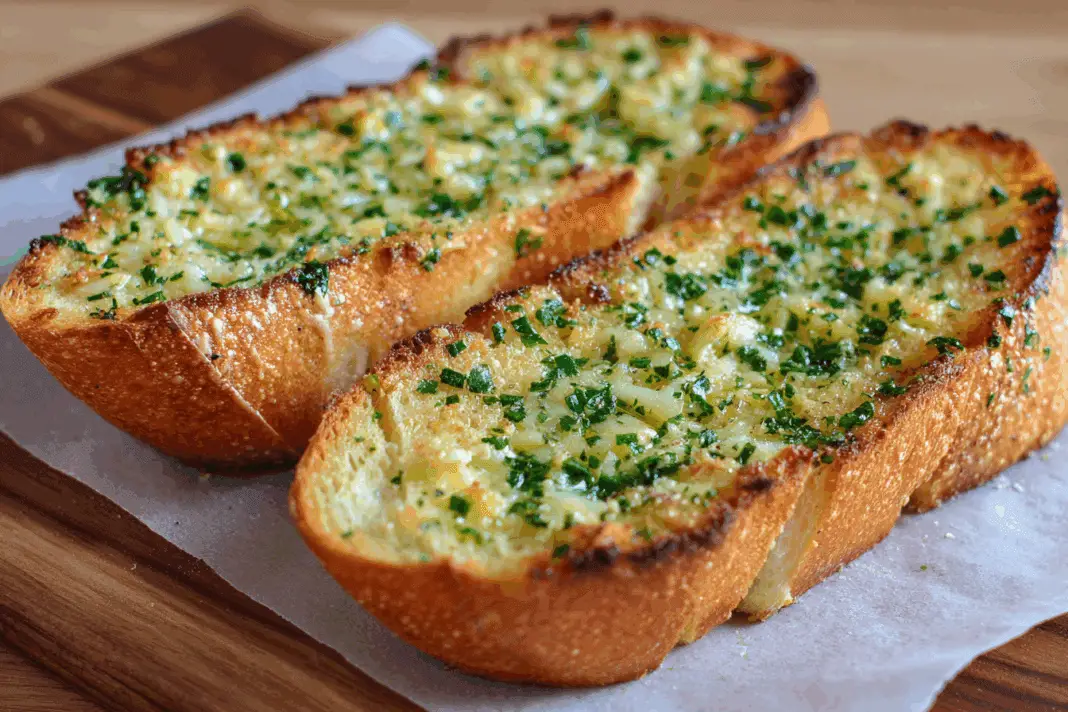
Most people think making garlic bread is simple—just slather some butter and garlic on bread and toss it in the oven. But if your garlic bread turns out soggy, burnt, or lacking that perfect crispy-yet-soft texture you get at restaurants, there’s a reason why. Professional chefs know specific techniques that transform ordinary bread into that golden, aromatic masterpiece that makes everyone at the table fight for the last piece.
Using the wrong butter temperature ruins everything
Cold butter straight from the fridge won’t spread evenly across your bread, leaving some spots dry and others with thick clumps. On the flip side, completely melted butter soaks into the bread immediately, creating a soggy mess instead of that perfect golden coating. The secret is using room temperature butter that’s soft enough to spread smoothly but still holds its shape.
Take your butter out of the fridge about 30 minutes before you plan to make garlic bread. It should give slightly when pressed but not be mushy. If you’re in a hurry, cut the butter into small cubes to help it soften faster. This technique ensures even distribution and prevents the common mistakes that lead to disappointing results.
Fresh garlic makes all the difference
Garlic powder might be convenient, but it can’t match the punch and aroma of fresh garlic. Pre-minced garlic from jars often tastes bitter and lacks the sharp, clean flavor that makes garlic bread irresistible. Fresh garlic cloves give you that restaurant-quality taste that makes people ask for your recipe.
The best approach combines both fresh minced garlic and a small amount of garlic powder. Fresh garlic provides that bright, sharp bite while garlic powder adds a deeper, toasted flavor when it hits the heat. Mince your fresh garlic finely to avoid large chunks that can burn or overpower individual bites. This double garlic technique creates layers of flavor that separate good garlic bread from great garlic bread.
The wrong bread ruins your efforts
Soft sandwich bread or pre-sliced loaves from the grocery store won’t give you the texture you want. These breads are too soft and often contain preservatives that affect the taste. Fresh French bread, Italian bread, or a good baguette provides the perfect foundation with a crispy crust and soft interior that can handle the butter mixture without falling apart.
Look for bread that’s no more than a day old from your local bakery or grocery store bakery section. The crust should sound hollow when tapped, and the interior should be light and airy. Day-old bread actually works better than completely fresh bread because it’s slightly drier and won’t get soggy when you add the butter mixture. Avoid anything with visible preservatives or that feels squishy when gently squeezed.
Skipping the cheese is a missed opportunity
Plain garlic bread is fine, but adding cheese elevates it to restaurant quality. Mozzarella gives you those Instagram-worthy cheese pulls, while Parmesan adds a nutty, salty depth that complements the garlic perfectly. The key is knowing when and how to add the cheese so it melts properly without burning.
For melty cheese like mozzarella, add it during the last few minutes of baking to prevent it from burning. Grated Parmesan can be mixed directly into the butter mixture since it won’t burn as easily. Romano cheese offers a sharper, more intense flavor if you prefer something bolder. The combination of textures and flavors makes each bite more interesting and satisfying than plain garlic bread.
Temperature control prevents burning disasters
Too many home cooks crank up the oven thinking higher heat means faster, better results. This approach usually leads to burnt garlic with a bitter taste and bread that’s crispy on the outside but still cold in the middle. The ideal temperature is 375°F, which gives you enough heat to create that golden crust without burning the delicate garlic.
If your oven runs hot, start checking your garlic bread after 8 minutes instead of waiting the full cooking time. The edges should be golden brown, and the cheese (if using) should be bubbly and lightly browned. For extra browning at the end, use the broiler for just 1-2 minutes, but watch it like a hawk since it can go from perfect to burnt in seconds.
Fresh herbs add restaurant polish
Dried herbs work in a pinch, but fresh herbs give your garlic bread that professional look and bright flavor that makes it special. Fresh parsley is the classic choice, but basil, oregano, or even rosemary can add interesting twists. The green color also makes the finished product more visually appealing.
Chop your fresh herbs finely and mix them into the butter mixture for even distribution. If you want to preserve their bright green color, save some to sprinkle on top after the bread comes out of the oven. Fresh herbs lose some potency when heated, so using both mixed-in and fresh-sprinkled herbs gives you the best of both worlds – integrated flavor and visual appeal.
Slice thickness affects the final result
Slices that are too thin will burn before the inside gets properly heated and buttery. Slices that are too thick become hard to bite through and don’t get the right ratio of crispy exterior to soft interior. The sweet spot is about 3/4 inch to 1 inch thick, which gives you enough surface area for the butter while maintaining good texture.
Use a sharp serrated knife to cut clean slices without crushing the bread. If you’re working with a whole baguette, cut it in half lengthwise instead of making individual slices – this creates more surface area for the butter mixture and makes serving easier. Keep your slices relatively uniform so they cook evenly and look professional when served.
Timing your garlic bread perfectly
Garlic bread is best served hot from the oven, which means timing it with the rest of your meal can be tricky. Making it too early leaves you with disappointing, lukewarm bread that’s lost its crispy edges. The good news is that you can prepare it in advance and freeze it for later baking.
Assemble your garlic bread completely, then wrap it tightly in plastic wrap and foil before freezing. When you’re ready to bake, it goes straight from freezer to oven – no thawing needed. Just add a few extra minutes to the cooking time. This make-ahead technique lets you serve restaurant-quality garlic bread even on busy weeknights without the last-minute stress.
Storage and reheating done right
Leftover garlic bread happens, but reheating it in the microwave turns it into a soggy, chewy mess. The microwave’s steam and uneven heating destroys the texture you worked so hard to create. Instead, use your oven, toaster oven, or even an air fryer to bring back that crispy exterior.
Wrap leftover pieces in foil and reheat at 350°F for about 10 minutes, then unwrap for the last few minutes to crisp up the edges. For single slices, a toaster oven works perfectly and doesn’t require preheating a full oven. Store leftovers properly wrapped in the refrigerator and use them within 2-3 days for the best quality and safety.
Perfect garlic bread isn’t complicated, but it does require attention to these key details that separate amateur attempts from restaurant-quality results. Fresh ingredients, proper temperatures, and good timing transform simple bread into something special that brings people together around the table. The next time you make garlic bread, these techniques will ensure it’s the kind that disappears before the main course even arrives.
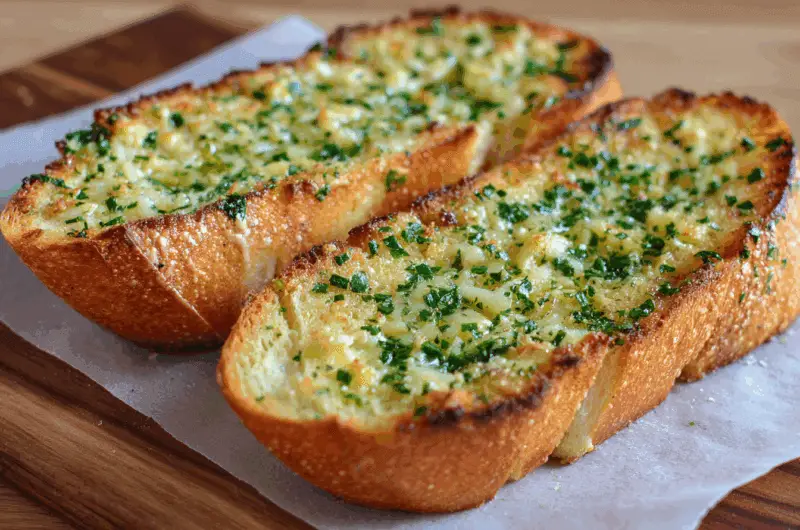
Perfect Homemade Garlic Bread
Course: Side Dish6
servings10
minutes12
minutes280
kcalThis restaurant-quality garlic bread combines fresh garlic, herbs, and the perfect butter technique for crispy edges and soft centers.
Ingredients
1 large French bread loaf or baguette
12 tablespoons salted butter, softened
4 cloves fresh garlic, minced
1/2 teaspoon garlic powder
2 tablespoons fresh parsley, finely chopped
1/4 teaspoon salt (if using unsalted butter)
1-2 cups shredded mozzarella cheese (optional)
1/4 cup grated Parmesan cheese (optional)
Directions
- Preheat your oven to 375°F and line a baking sheet with parchment paper. Cut the French bread in half lengthwise, creating two long pieces with the cut sides facing up. Place the bread cut-side up on the prepared baking sheet.
- In a medium bowl, combine the softened butter, minced fresh garlic, garlic powder, chopped parsley, and salt (if using unsalted butter). Mix thoroughly until all ingredients are evenly distributed and the mixture is smooth and well-combined.
- Spread the garlic butter mixture evenly over both cut sides of the bread, making sure to cover the surface completely from edge to edge. Use a butter knife or small offset spatula to ensure even distribution without leaving any dry spots.
- If using Parmesan cheese, sprinkle it evenly over the buttered bread now. Place the bread in the preheated oven and bake for 10-12 minutes, or until the edges are golden brown and the surface is lightly toasted.
- If using mozzarella cheese, remove the bread from the oven and sprinkle the cheese evenly over both halves. Return to the oven for an additional 2-3 minutes, or until the cheese is melted and bubbly.
- For extra browning and crispiness, turn on the broiler for the final 1-2 minutes of cooking time. Watch carefully to prevent burning, as the broiler works quickly and can go from perfect to burnt in seconds.
- Remove from the oven and let cool for 2-3 minutes before slicing. Cut each half into 2-3 inch pieces using a sharp serrated knife, cutting straight down to avoid crushing the bread.
- Serve immediately while hot for the best texture and flavor. Garnish with additional fresh parsley if desired, and enjoy with your favorite pasta dish, soup, or Italian meal.
Notes
- Make sure butter is at room temperature for easy spreading – take it out 30 minutes before cooking
- For make-ahead preparation, assemble completely and freeze wrapped in plastic and foil for up to 2 months
- Reheat leftovers in a 350°F oven wrapped in foil for 10 minutes, then unwrap for the last 2-3 minutes to crisp
- Avoid using pre-minced garlic from jars as it can taste bitter – fresh garlic makes a noticeable difference
Frequently asked questions
Q: Can I make garlic bread with regular sandwich bread?
A: While possible, sandwich bread won’t give you the same results as French or Italian bread. The soft texture becomes soggy easily, and it lacks the sturdy crust needed for proper garlic bread. Stick with crusty bread from a bakery for the best texture and flavor.
Q: How do I prevent my garlic from burning?
A: Keep your oven temperature at 375°F and mince the garlic very finely so it cooks evenly. Large chunks of garlic burn faster than small pieces. If your oven runs hot, check the bread after 8 minutes instead of waiting the full cooking time.
Q: Can I use olive oil instead of butter?
A: Yes, but use it sparingly with a pastry brush rather than pouring it on. Olive oil soaks into bread faster than butter, so apply it gradually and check halfway through baking to see if you need more. The flavor will be different but still delicious.
Q: Why does my garlic bread turn out soggy?
A: This usually happens from using melted butter instead of softened butter, or using bread that’s too fresh and soft. Make sure your butter is room temperature but not melted, and use day-old bread from a bakery rather than soft sandwich bread.
