 (1)")

Making gravy shouldn’t feel like solving a complex math problem, but somehow it does for most home cooks. The truth is, perfect gravy comes down to understanding one simple ratio and following a few key steps that professional chefs have been using for decades. Once you master this foolproof method, you’ll never need to rely on packets or jars again.
Getting the fat to flour ratio wrong
Most people wing it when making gravy, throwing in random amounts of flour and butter until something happens. This approach leads to either watery disappointment or thick paste that could double as wallpaper glue. The magic ratio that changes everything is surprisingly simple: equal parts fat and flour, with liquid added gradually.
Professional kitchens swear by the 1:1:8 ratio – one part fat, one part flour, eight parts liquid. For a typical family dinner, that translates to 4 tablespoons butter, 4 tablespoons flour, and 2 cups of liquid. This proven formula works every single time, whether you’re making gravy for Sunday dinner or Thanksgiving feast.
Adding liquid too quickly creates lumps
The biggest mistake happens when people dump all the liquid at once into their flour and butter mixture. This creates instant lumps that are nearly impossible to whisk out completely. Instead, add liquid gradually, starting with just a splash and whisking until completely smooth before adding more.
Start by adding about one-sixth of your total liquid to the flour-butter mixture, whisking vigorously until you have a smooth paste. Continue adding liquid in small amounts, whisking constantly between additions. This gradual approach prevents lumps from forming and ensures a silky-smooth texture that coats the back of a spoon perfectly.
Using the wrong type of liquid
Water makes weak gravy, while straight drippings can be overpowering or too salty. The secret lies in combining different liquids to create depth without overwhelming the palate. Start with your pan drippings, but taste them first – sometimes they’re too salty from seasoned meat or too weak from lean cuts.
Mix drippings with unsalted chicken or beef stock to balance the strength. If your drippings taste perfect, use them for half the liquid and stock for the other half. Wine adds complexity – just a few tablespoons mixed with stock creates restaurant-quality gravy. Even milk works beautifully for white gravy when you want something creamy and mild.
Skipping the roux cooking step
Many recipes tell you to cook the flour and butter mixture for several minutes before adding liquid, but plenty of home cooks skip this step entirely. Cooking the roux eliminates the raw flour taste and creates a deeper, nuttier base for your gravy. The mixture should bubble and smell toasty, not floury.
Cook your butter and flour mixture over medium heat for about 2-3 minutes, stirring constantly. The mixture will start thin, then thicken, then thin out again as it cooks. This process develops better thickening power and prevents that chalky flour taste that ruins otherwise good gravy. Don’t rush this step – proper roux development makes all the difference.
Not separating fat from drippings properly
Pan drippings contain both fat and flavorful juices, but using them without separation creates greasy gravy that leaves an oily film on everything. A gravy separator looks like a measuring cup with a spout at the bottom, allowing you to pour off the good stuff while leaving the fat behind.
If you don’t have a separator, pour drippings into a clear container and let them sit for a few minutes. The fat will rise to the top, making it easy to skim off with a spoon. Use some of that fat for your roux if you want extra meaty taste, but don’t use all of it. The separated juices contain concentrated meat goodness without the grease.
Seasoning at the wrong time
Adding salt and pepper too early in the process can lead to over-seasoned gravy, especially since the liquid reduces as it cooks. Drippings often contain salt from seasoned meat, and stock adds more sodium. Season gradually at the end, tasting as you go.
Start with just a pinch of salt and pepper after your gravy has reached the right consistency. Taste, then add more if needed. Remember that gravy will concentrate as it sits, so slightly under-seasoning is better than overdoing it. Fresh herbs like thyme or sage can be added in the last minute for extra depth without overwhelming the meat’s natural goodness.
Making gravy directly in the roasting pan
While it seems logical to make gravy right where the drippings are, roasting pans are usually too large and unwieldy for proper whisking. The wide, shallow surface makes it difficult to control the consistency and temperature. Plus, you risk burning the bottom while trying to incorporate ingredients properly.
Transfer your separated drippings to a regular saucepan where you have better control over heat and mixing. Scrape up any browned bits from the roasting pan with a splash of wine or stock, then add this flavorful liquid to your saucepan. This method gives you complete control over the process while still capturing every bit of roasted goodness.
Not thickening to the right consistency
Gravy should coat the back of a spoon without being gluey or running off like water. The perfect consistency falls somewhere between heavy cream and maple syrup. Many people stop cooking too early, leaving thin gravy that doesn’t cling to food properly.
After adding all your liquid, bring the mixture to a gentle boil, then reduce heat and simmer for 5-7 minutes. The gravy will continue to thicken as it cools slightly. If it’s too thick, whisk in a little more warm stock. If it’s too thin, simmer longer or make a small amount of additional roux to stir in. Remember that gravy thickens more as it cools, so aim for slightly thinner than your final desired consistency.
Forgetting to strain before serving
Even perfectly made gravy can have small lumps or bits of herbs that some people find unappetizing. Straining through a fine mesh sieve creates restaurant-quality smoothness that elevates your entire meal. This step takes less than a minute but makes a huge difference in presentation.
Pour finished gravy through a fine mesh strainer directly into your serving vessel or gravy boat. Use a spoon to gently press any remaining bits through the strainer to extract maximum goodness. This optional step transforms good gravy into great gravy, removing any imperfections while maintaining all the rich taste you’ve worked to develop.
Perfect gravy isn’t about following complicated techniques or using expensive ingredients. It’s about understanding the basic principles and avoiding common pitfalls that trip up even experienced cooks. Master these fundamentals, and you’ll have a recipe worth memorizing for life.
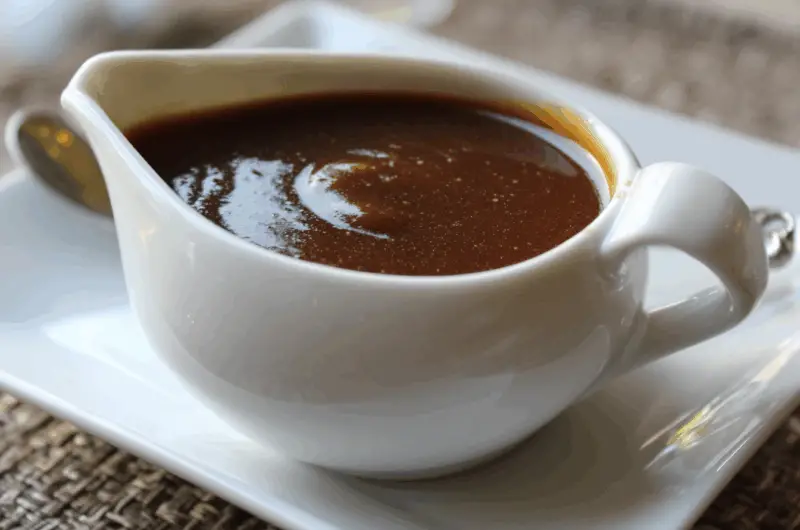
Perfect Homemade Gravy
Course: Side Dish6
servings5
minutes10
minutes75
kcalRich, smooth gravy made from scratch using the perfect ratio of fat, flour, and liquid that works every time.
Ingredients
4 tablespoons butter or rendered fat from roast
4 tablespoons all-purpose flour
2 cups pan drippings (fat separated) or chicken stock
1/2 teaspoon salt, or to taste
1/4 teaspoon black pepper, or to taste
Additional stock or wine if needed for consistency
Directions
- Melt butter in a medium saucepan over medium heat. If using rendered fat from your roast, measure it carefully and add to the pan. Allow the fat to heat until it begins to shimmer but not smoke.
- Add flour to the melted fat and whisk constantly for 2-3 minutes until the mixture bubbles and develops a toasty aroma. The roux will start thin, thicken, then thin out again as it cooks properly. This step eliminates any raw flour taste.
- Remove pan from heat and gradually whisk in about 1/3 cup of your liquid, whisking vigorously until completely smooth. The mixture will seize up at first, but keep whisking and it will become smooth and creamy.
- Continue adding liquid in small amounts, whisking constantly between additions until all liquid is incorporated. Add each portion only after the previous addition is completely smooth to prevent lumps from forming.
- Return pan to medium-high heat and bring mixture to a gentle boil, stirring frequently. Once boiling, reduce heat to low and simmer for 5-7 minutes until gravy thickens to coat the back of a spoon.
- Taste and season with salt and pepper, starting with small amounts and adjusting to your preference. Remember that gravy will concentrate slightly as it sits, so slightly under-seasoning is better than overdoing it.
- For perfectly smooth gravy, strain through a fine mesh sieve into your serving vessel or gravy boat. Use a spoon to gently press any remaining bits through the strainer to extract maximum goodness.
- Serve immediately while hot. If gravy becomes too thick while sitting, whisk in a little warm stock or pan drippings to restore desired consistency.
Notes
- If your pan drippings are too salty, dilute with unsalted stock or water to taste before using
- Gravy can be made ahead and reheated gently on the stovetop, whisking to restore smoothness
- For richer gravy, use a combination of butter and rendered fat from your roast
- Leftover gravy can be frozen for up to 3 months and reheated from frozen
- If lumps form despite careful whisking, strain the finished gravy through a fine mesh sieve
Frequently asked questions
Q: Can I make gravy without drippings from a roast?
A: Absolutely! Use butter for the fat and good quality chicken or beef stock for the liquid. You can also add a splash of wine or soy sauce for extra depth of taste. The technique remains exactly the same.
Q: How do I fix lumpy gravy?
A: Strain it through a fine mesh sieve, pressing the lumps through with a spoon. For future batches, add liquid more gradually and whisk constantly. If you have an immersion blender, a few quick pulses can also smooth out minor lumps.
Q: Why does my gravy taste like flour?
A: This happens when you don’t cook the roux long enough before adding liquid. Cook the butter and flour mixture for 2-3 minutes until it smells toasty and nutty. Also, make sure to simmer the finished gravy for several minutes to cook out any remaining flour taste.
Q: How long can I keep leftover gravy?
A: Refrigerate leftover gravy for up to 4 days or freeze for up to 3 months. Reheat gently on the stovetop, whisking frequently. You may need to add a little stock or water to restore the original consistency since gravy thickens when cold.