

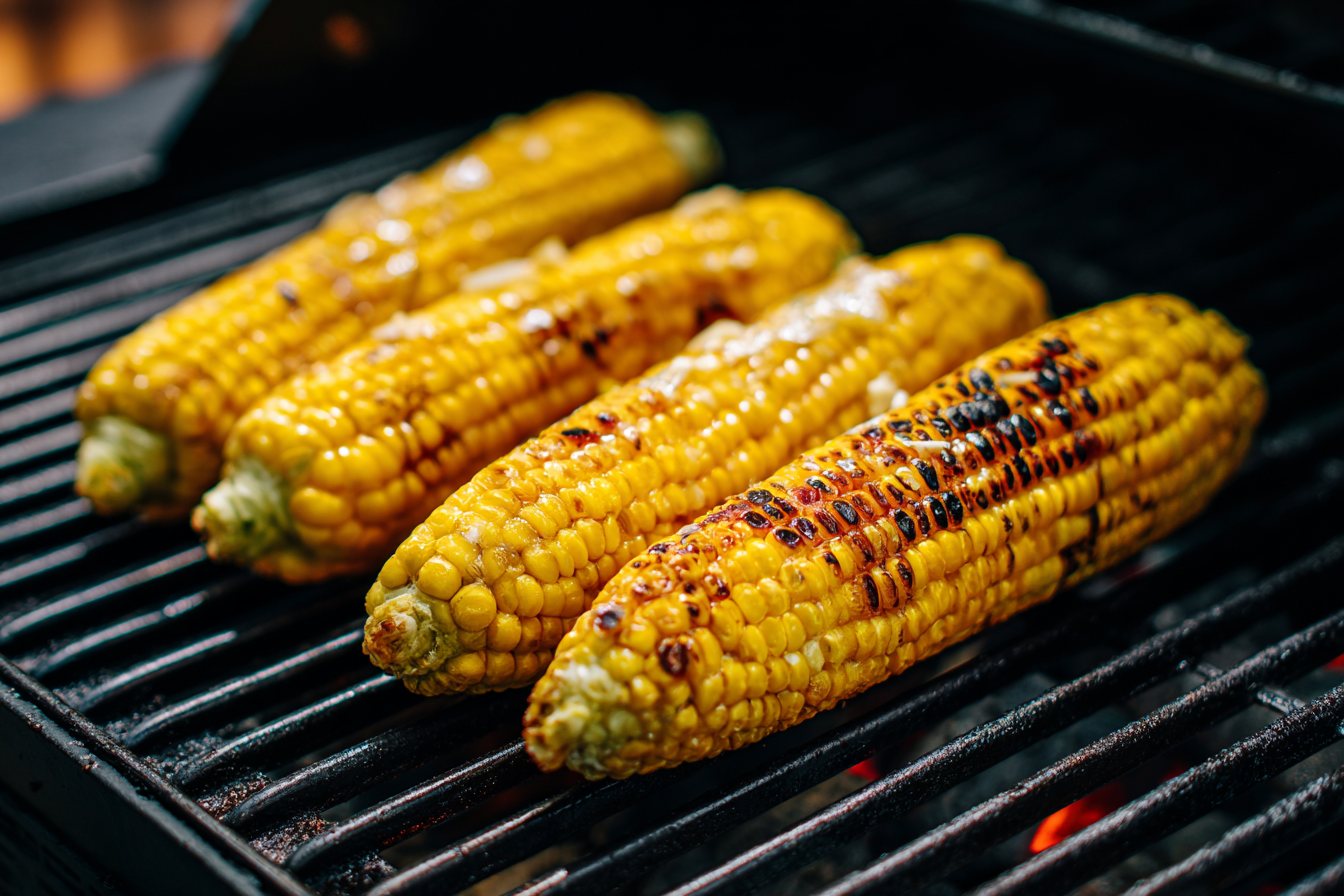
Perfect Grilled Corn with Garlic Butter
Course: Side Dish6
servings20
20
minutes180
This grilled corn recipe creates perfectly steamed kernels with smoky char marks that will have everyone asking for your secret technique.
Ingredients
6 ears fresh corn, unhusked
1/2 cup butter
5 cloves garlic, minced
1 tablespoon white sugar
1 teaspoon salt
1 teaspoon black pepper
1 teaspoon ground cumin
1/2 lime, juiced
2 tablespoons hot sauce
Directions
- Fill a clean sink with cool water and submerge the unhusked corn ears for 15 minutes. Use a dinner plate to weigh them down if they float. This prevents the husks from burning and creates steam for even cooking. Drain and shake off excess water before grilling.
- Preheat grill to medium heat and lightly oil the grates to prevent sticking. While the grill heats, prepare the garlic butter by heating minced garlic and butter in a small saucepan over low heat for 5 minutes. Do not let the butter simmer or the garlic will become bitter.
- In a small bowl, mix together sugar, salt, black pepper, and cumin. Stir this spice mixture into the warm garlic butter along with lime juice and hot sauce until evenly blended. Set aside half of this mixture for final serving and use the rest for basting during cooking.
- Place the soaked corn directly on the grill grates and close the lid. Cook for 6 minutes, then rotate each ear and cook for another 6 minutes. The husks should turn golden brown and may char slightly, which is normal and adds to the smoky taste.
- Remove corn from grill and let cool for 2-3 minutes until safe to handle. Carefully peel back the husks (they make great handles) and remove the silk, which should pull away easily in clean sections. If any silk remains, use a soft brush to remove it gently.
- Increase grill temperature to medium-high heat. Brush the shucked corn ears generously with the garlic butter mixture, making sure to coat all sides evenly. Reserve remaining butter for final serving.
- Return corn to the grill and cook for 3-4 minutes per side, rotating to create even char marks all around. Keep the pulled-back husks away from direct flames to prevent burning. The kernels should develop beautiful golden-brown spots.
- Remove from grill and immediately brush with the reserved garlic butter mixture while the corn is still hot. Sprinkle with additional salt if desired and serve immediately while warm. The husks make perfect handles for eating.
Notes
- Fresh corn works best – look for bright green husks and plump kernels when pressed gently through the husk
- If corn seems dry, soak for an extra 5 minutes to ensure proper steaming during the first cooking phase
- Garlic butter can be made ahead and stored in refrigerator – just reheat gently before using
Most people think grilling corn is just tossing it on the grates and hoping for the best. But there’s a surprisingly simple technique that transforms ordinary corn into something spectacular – and it starts with leaving the husks on! This method creates perfectly steamed kernels inside while developing incredible smoky notes, making corn so good that guests will literally ask what makes it taste different from everyone else’s.
Soaking the corn prevents burning and adds moisture
The secret starts before the corn even touches the grill. Filling a clean sink with cool water and soaking unshucked ears for 15 minutes makes all the difference. This step prevents the outer husks from catching fire immediately and creates steam inside during the first part of cooking. Many people skip this step thinking it’s unnecessary, but it’s what separates good grilled corn from amazing grilled corn.
The soaking process essentially turns each ear into its own little steamer. As the corn heats up, that absorbed water creates steam inside the husks, cooking the kernels evenly while infusing them with a subtle grassy sweetness. Professional chefs recommend using a dinner plate to keep the corn submerged if it tries to float. After soaking, just shake off the excess water and head straight to the grill.
Medium heat works better than high temperature
Too many home cooks crank their grills to high heat thinking it’ll cook the corn faster. This actually backfires because the husks burn before the kernels inside have time to cook properly. Medium heat allows the corn to steam gently inside its natural wrapper for about 12 minutes total. The outside husks will turn a beautiful golden brown while the kernels inside become tender and sweet.
The timing is crucial here – 6 minutes on each side with the grill lid closed. This creates an oven-like environment that cooks the corn evenly all around. Grilling experts note that keeping the lid closed maintains consistent temperature and prevents hot spots that can char the husks unevenly. The corn is essentially done after this initial cooking phase, making the rest of the process about adding that signature grilled taste.
Shucking becomes effortless after grilling
Anyone who’s wrestled with fresh corn silk knows the frustration of those stubborn threads that seem impossible to remove. Grilling the corn first completely changes this experience. After the initial cooking time, the husks peel back easily and the silk pulls away in clean sections instead of leaving annoying bits stuck to the kernels. It’s almost magical how smoothly everything comes off.
The heat essentially loosens the connection between the silk and kernels, similar to how microwaving corn works but with added smoky notes. When removing the husks, most people pull them back rather than removing them completely – they make perfect handles for eating and look impressive on the plate. If any stubborn silk remains, a soft-bristled brush makes quick work of it without damaging the tender kernels underneath.
Adding char creates the signature grilled taste
The corn is technically ready to eat after the initial steaming phase, but adding char marks takes it from good to extraordinary. Increasing the grill temperature to medium-high and placing the shucked ears directly on the grates for 3-4 minutes per side creates those beautiful brown spots that scream “grilled perfection.” This step adds a nutty, caramelized taste that you simply can’t get from boiled corn.
When charring, keep those pulled-back husks away from direct flames since they’re now dry and will catch fire quickly. Many grillers hang them over the edge of the grill or use tongs to keep them positioned safely. The char marks aren’t just for looks – they represent spots where the natural sugars in the corn have caramelized, creating complex smoky-sweet notes that make people wonder what makes this corn taste so different.
Garlic butter elevates the entire experience
Plain butter is fine, but garlic butter transforms grilled corn into something restaurant-worthy. The trick is gently heating minced garlic in butter over low heat for about 5 minutes – just enough to infuse the butter without browning the garlic. This creates an aromatic base that complements the corn’s natural sweetness while adding savory depth that keeps people coming back for more ears.
The beauty of making compound butter is that it can be prepared ahead of time and stored in the refrigerator. Adding a squeeze of lime juice, a pinch of cumin, and even a dash of hot sauce creates layers of taste that work perfectly with corn’s mild sweetness. Brush this mixture on the corn both during the final charring phase and again just before serving to ensure every bite is packed with those amazing complementary notes.
Fresh corn makes all the difference
The difference between day-old corn and farm-fresh corn is dramatic. As soon as corn is picked, natural sugars begin converting to starch, making the kernels less sweet and more mealy. Farmers markets and farm stands that pick corn the same day offer the best option, but even grocery store corn can be good if it’s properly stored and hasn’t been sitting around too long.
When selecting corn, look for bright green husks that feel slightly damp and silks that aren’t completely dried out. The kernels should feel plump when pressed gently through the husk, and there shouldn’t be any dark spots or signs of worm damage at the tip. Cook the corn as soon as possible after purchase – even a day in the refrigerator affects the taste and texture noticeably.
Timing everything together requires planning
Grilled corn timing doesn’t always align perfectly with other barbecue items, so planning becomes important. The initial steaming phase takes about 12 minutes, plus shucking time, plus another 6-8 minutes for charring. That’s nearly 25 minutes total, which might be longer than burgers or hot dogs. Smart grillers start the corn first, then add quicker-cooking items later.
The advantage of this method is that corn holds its heat well after the initial cooking phase. It can sit and stay warm while other items finish cooking, then get its final char marks right before serving. This flexibility makes it perfect for larger gatherings where multiple items need to come off the grill at different times. Having that garlic butter ready to go ensures everything comes together seamlessly when it’s time to eat.
Common mistakes ruin otherwise perfect corn
The biggest mistake people make is trying to rush the process with high heat. This burns the outside before the inside cooks properly, leaving tough kernels wrapped in charred husks. Another common error is skipping the soaking step or not soaking long enough. Fifteen minutes might seem excessive, but it’s what prevents those frustrating flare-ups that blacken everything before the corn is ready.
Over-charring is another pitfall – those beautiful grill marks can quickly turn into burnt spots that taste bitter rather than smoky. The char phase should be brief and controlled, just long enough to develop color and caramelization. Finally, many people brush on butter or seasonings too early, causing them to burn during the cooking process. Save the good stuff for the end when it can shine without getting scorched.
Leftover corn works great in other dishes
Grilled corn kernels cut from the cob make fantastic additions to salads, salsas, and pasta dishes. That smoky taste adds depth to everything from simple green salads to complex Mexican street corn salads. The kernels can be stored in the refrigerator for several days and actually taste better in cold applications than regular boiled corn because of those caramelized notes from grilling.
Corn chowders and soups benefit tremendously from using grilled corn instead of regular corn. The smoky sweetness adds complexity that makes people think expensive ingredients were used when really it’s just better technique. Even simple fried rice becomes more interesting with grilled corn kernels mixed in. The key is cutting the kernels off cleanly with a sharp knife, working over a large bowl to catch everything.
This grilling method transforms ordinary corn into something special that people remember long after the meal ends. The combination of proper soaking, controlled heat, easy shucking, and perfect charring creates corn with incredible taste and visual appeal. Next time someone asks for the recipe, just smile and tell them it’s all about treating the corn right from start to finish.
Frequently asked questions about grilled corn
Q: Can I grill corn without soaking it first?
A: While possible, soaking prevents the husks from burning too quickly and creates steam for even cooking. Without soaking, the outside often chars before the kernels are tender, resulting in tough or unevenly cooked corn.
Q: How do I know when the corn is done cooking?
A: After the initial 12-minute steaming phase, the kernels should feel tender when pressed gently through the husk. You can also carefully peel back a small section to check – the kernels should look plump and bright yellow.
Q: What if I don’t have a grill lid?
A: The lid helps create even heat distribution, but you can still make great corn without one. Just rotate the ears more frequently (every 2-3 minutes) and expect slightly longer cooking times, around 15-18 minutes total for the initial phase.
Q: Can I prepare the garlic butter ahead of time?
A: Absolutely! The garlic butter mixture can be made up to 3 days ahead and stored in the refrigerator. Just reheat it gently in a small saucepan before using, and don’t let it get hot enough to simmer.
