 (1)")

Most microwave mug cakes taste like rubbery disappointments that make you question why you didn’t just wait to make a real cake. After trying dozens of recipes that promised “amazing results in minutes,” most of us have given up on the whole concept. But what if there was actually a way to make a mug cake that tastes genuinely good? This chocolate mug cake recipe changes everything about quick desserts, delivering rich chocolate satisfaction without the usual microwave cake disasters.
Why most mug cakes taste terrible
The biggest problem with mug cake recipes is they’re usually just regular cake recipes shrunk down without adjusting for how microwaves actually work. Microwaves heat food from the outside in, creating steam that makes cakes soggy and dense. Most recipes also call for whole eggs, which is ridiculous when you’re making a single serving. That leftover egg white sits in your fridge until it goes bad, and using a whole egg in such a small cake makes the texture weird and spongy.
The best mug cake recipes understand these limitations and work around them. They use the right ratio of wet to dry ingredients to prevent that awful rubbery texture. Instead of trying to replicate oven baking, they embrace what microwaves do well – creating moist, fudgy textures that actually work better for chocolate desserts than traditional baking methods.
The secret ingredients that make the difference
This recipe skips the egg entirely and relies on the perfect balance of flour, cocoa powder, and leavening agents. The key is using just enough baking soda to create lift without making the cake taste soapy or bitter. Many failed mug cakes use too much baking powder, which creates a chemical aftertaste that ruins the chocolate experience. The ratio here – just 1/8 teaspoon of baking soda – provides gentle rise without overwhelming the other ingredients.
The liquid combination is equally important. Using both milk and oil creates moisture, while a small amount of water helps distribute the leavening evenly. Vanilla extract isn’t just for flavor – it actually helps mask any slight chemical notes from the baking soda. This chocolate mug cake achieves the perfect balance of rich chocolate taste and tender crumb that most recipes completely miss.
Getting the microwave timing exactly right
Microwave power varies wildly between models, which is why most mug cake recipes fail. A 1000-watt microwave cooks completely differently than a 700-watt model, but most recipes give one generic time that works for nobody. The trick is starting with less time than you think you need. This cake should look slightly underdone when you first check it – the center might still be a tiny bit shiny and soft to the touch.
The resting period is crucial and often ignored in other recipes. Letting the cake sit in the microwave for a full minute after cooking allows the residual heat to finish the cooking process gently. This prevents that overcooked, rubbery texture that makes most mug cakes inedible. Start with 70 seconds of cooking time, let it rest, then add 15-second increments if needed. Most people overcook their first attempt because they expect it to look “done” like an oven cake.
Choosing the right mug makes a difference
Not all mugs are created equal for baking. Thin ceramic mugs heat too quickly and can create hot spots that cook unevenly. Thick, heavy mugs take forever to heat up and can leave you with raw batter in some spots. The ideal mug is medium-weight ceramic, about 12-16 ounces in capacity. Glass mugs work well too, but avoid anything with metallic trim or decorations that could spark in the microwave.
The shape matters more than you’d expect. Wide, shallow mugs cook more evenly than tall, narrow ones because microwaves penetrate better when the batter isn’t too deep. Coffee shop-style mugs with straight sides work better than those with curved walls. Before starting, lightly spray the bottom with cooking spray – this isn’t just for easy removal, it actually helps the cake cook more evenly by creating a slight barrier between the batter and the mug.
Mix-ins that actually work in the microwave
Regular chocolate chips can turn into molten lava pockets that burn your mouth, but mini chocolate chips distribute more evenly and create pockets of melted chocolate without the danger. Peanut butter chips, butterscotch chips, and white chocolate chips all work beautifully. A small spoonful of Nutella stirred in before cooking creates ribbons of hazelnut richness throughout the cake. Just don’t go overboard – more than a teaspoon of mix-ins can throw off the moisture balance.
Nuts need to be chopped finely to work in this small format. Whole pieces create air pockets that can cause uneven cooking. Coconut flakes toast slightly in the microwave and add great texture, while a tiny pinch of cinnamon or espresso powder intensifies the chocolate without adding bulk. The beauty of this base recipe is its flexibility – you can customize it differently every time without worrying about ruining the fundamental chemistry that makes it work.
Common mistakes that ruin everything
The biggest mistake is not mixing thoroughly enough. Microwave cooking happens so fast that any lumps of dry ingredients won’t have time to incorporate, leaving you with pockets of flour or cocoa powder. Scrape the bottom of the mug while mixing – dry ingredients love to hide there. Another common error is using cold ingredients straight from the fridge. Room temperature milk and oil mix better and cook more evenly than cold ingredients that can create temperature variations.
Overcooking is the most frequent problem, usually because people expect the cake to look “done” like it would from an oven. The surface should still look slightly moist and barely set when you stop cooking. Many people also skip the resting time and dig in immediately, then wonder why their cake is either too hot or has an odd texture. Patience during that one-minute rest period makes the difference between success and disappointment.
Making it ahead for busy weeknights
Smart home cooks pre-mix the dry ingredients in small containers or even directly in mugs, then store them in the pantry. This turns the recipe into a true emergency dessert – just add the wet ingredients and microwave. The dry mixture stays fresh for weeks in an airtight container. Some people make multiple portions worth and store them in mason jars, creating an instant dessert kit that’s faster than any boxed mix.
For families, this approach lets everyone customize their own dessert. Kids can choose their own mix-ins while parents control the base recipe. Having pre-made dry mixes on hand means unexpected guests can be served warm cake within five minutes of arriving. It’s also perfect for dorm rooms, offices with microwaves, or anywhere you need a quick dessert without a full kitchen setup.
Why this beats store-bought alternatives
Packaged mug cake mixes cost three to four times more per serving than making your own, and they’re loaded with preservatives and artificial ingredients. Most commercial versions taste artificial and have that chemical aftertaste that screams “processed food.” Making your own means you control every ingredient – no weird stabilizers, no artificial colors, and no ingredients you can’t pronounce. Plus, you can adjust the sweetness level to your preference.
The freshness factor is huge too. This cake is literally made to order, hot and fresh every single time. Store-bought options sit on shelves for months before you eat them. Even the “premium” packaged versions can’t compete with the rich, genuine chocolate taste you get from real cocoa powder and vanilla extract. When you factor in the convenience of having all the ingredients on hand already, homemade becomes both cheaper and better.
Serving suggestions that make it special
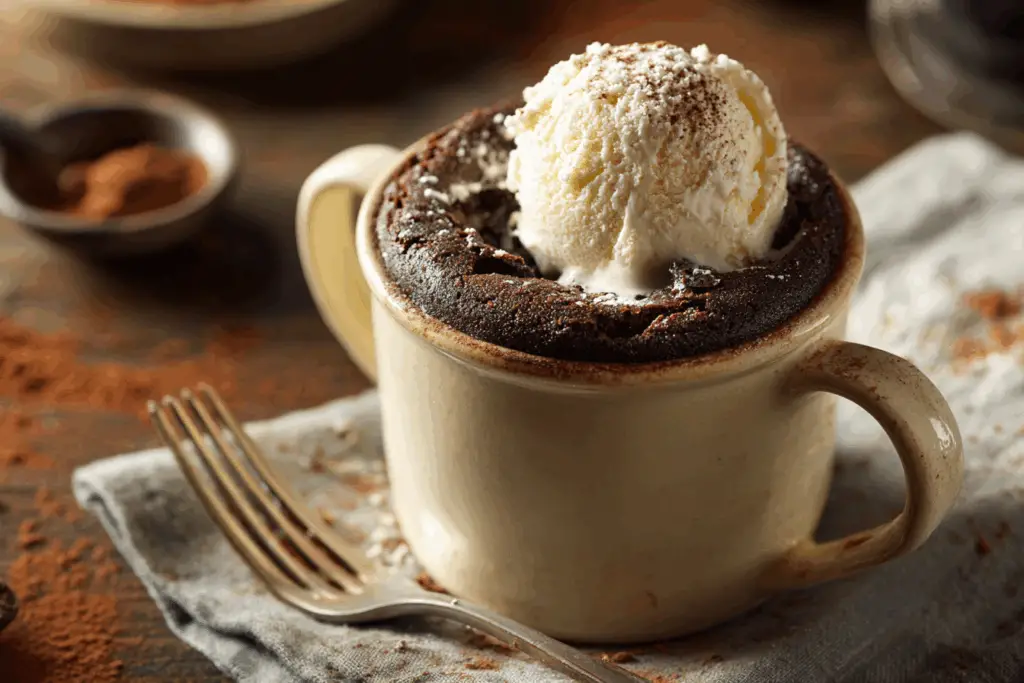
This cake is delicious plain, but a few simple additions transform it into something restaurant-worthy. A small scoop of vanilla ice cream on top creates an instant warm-and-cold contrast that’s incredibly satisfying. A drizzle of caramel sauce, a dollop of whipped cream, or even just a dusting of powdered sugar makes it feel more intentional than a quick microwave dessert. Fresh berries add color and tartness that balances the rich chocolate.
For special occasions, try serving it in a nice ceramic ramekin instead of a mug – it immediately looks more elegant. A sprinkle of sea salt on top before serving enhances the chocolate and makes it taste more sophisticated. Hot fudge sauce, crushed cookies, or toasted nuts turn this simple cake into a sundae-style dessert that impresses guests who have no idea how easy it was to make.
This mug cake recipe finally delivers on the promise that quick desserts can actually taste good. No more settling for rubbery disappointments or expensive store-bought alternatives that taste artificial. With the right technique and timing, you can have genuinely delicious chocolate cake ready in under five minutes whenever the craving hits. Once you master this basic recipe, you’ll wonder why you ever struggled with complicated desserts when something this simple works so perfectly.
Perfect Microwave Chocolate Mug Cake
Course: Dessert1
servings3
minutes1
hour30
minutes360
kcalA rich, fudgy chocolate cake that cooks perfectly in the microwave and actually tastes like real cake, not rubber.
Ingredients
¼ cup all-purpose flour
¼ cup granulated sugar
2 tablespoons unsweetened cocoa powder
⅛ teaspoon baking soda
⅛ teaspoon salt
3 tablespoons milk
2 tablespoons canola oil
1 tablespoon water
¼ teaspoon vanilla extract
Directions
- Lightly spray the bottom of a large microwave-safe mug with cooking spray. Choose a mug that holds at least 12 ounces to prevent overflow during cooking.
- Add flour, sugar, cocoa powder, baking soda, and salt to the mug. Whisk together with a fork until well combined and no lumps remain.
- Pour in milk, canola oil, water, and vanilla extract. Stir thoroughly, making sure to scrape the bottom of the mug to incorporate all dry ingredients.
- Microwave on high power for 70-90 seconds, depending on your microwave’s wattage. The cake should look just set on top but still slightly shiny in the center.
- Let the cake rest in the microwave for 1 full minute before removing. This resting time allows the cake to finish cooking gently and prevents a rubbery texture.
- Carefully remove the mug (it will be hot) and let cool for another minute before eating. Top with ice cream, whipped cream, or enjoy plain while warm.
Notes
- Start with 70 seconds cooking time for 1000+ watt microwaves, or 90 seconds for lower wattage models. Add 15-second increments if needed.
- The cake should look slightly underdone when you first check it – the resting period finishes the cooking process.
- For mix-ins like chocolate chips or nuts, add 1 teaspoon maximum to avoid affecting the texture.
- Dry ingredients can be pre-mixed and stored in airtight containers for quick assembly later.
Frequently asked questions
Q: Why does my mug cake always come out rubbery?
A: This usually happens from overcooking or using too much liquid. Start with less cooking time than you think you need, and make sure you’re measuring ingredients accurately. The cake should still look slightly shiny on top when you stop cooking.
Q: Can I make this without eggs like the recipe calls for?
A: Yes, this recipe is designed to work without eggs. Using a whole egg in such a small cake makes the texture weird and spongy. The combination of baking soda, milk, and oil provides all the moisture and rise needed.
Q: My mug cake overflowed in the microwave. What went wrong?
A: You probably used too small a mug or added too many mix-ins. Use a mug that holds at least 12 ounces, and limit add-ins like chocolate chips to 1 teaspoon maximum. The batter needs room to rise during cooking.
Q: Can I double this recipe to make two servings?
A: It’s better to make two separate mugs rather than doubling in one container. Microwave cooking works best with smaller portions. If you want to make two at once, cook them one at a time for best results.