 (1)")

Making dessert doesn’t have to mean turning on the oven or spending hours in the kitchen. This ridiculously simple no-bake peanut butter pie comes together in just 20 minutes with ingredients most people already have on hand. The best part? It tastes like something from a fancy bakery, but requires zero baking skills and uses shortcuts that actually make it better than complicated versions.
Why this simple recipe beats complicated versions
Sometimes the easiest recipes are the ones that surprise people the most. This peanut butter pie uses just five main ingredients: cream cheese, peanut butter, sugar, Cool Whip, and Oreos for the crust. While fancy bakers might turn their noses up at using Cool Whip, it actually creates the perfect texture that’s impossible to achieve with homemade whipped cream alone. The stabilizers in Cool Whip keep the pie from getting watery or deflating over time.
The magic happens when these simple ingredients come together to create something that tastes incredibly rich and complex. The cream cheese adds tanginess that balances the sweet peanut butter, while the Oreo crust provides the perfect chocolate contrast. Many people say this tastes better than peanut butter pies that take hours to make and require tempering chocolate or making custard from scratch.
Making the perfect Oreo crust without getting soggy
The secret to a great Oreo crust is getting the butter ratio just right and pressing it properly. Use about 30 whole Oreos (don’t remove the filling) and 5-6 tablespoons of melted butter. Pulse the cookies in a food processor until they’re fine crumbs, then slowly add the melted butter while the processor runs. The mixture should hold together when squeezed but not be overly wet or greasy.
Press the mixture firmly into a 9-inch pie plate, making sure to get it up the sides evenly. Use the bottom of a measuring cup or glass to really pack it down. Then freeze the crust for at least 20 minutes before adding the filling. This step is crucial because it prevents the crust from getting soggy when the creamy filling goes on top. A firm, cold crust also makes slicing much cleaner later.
Getting the filling texture absolutely perfect
The key to silky smooth filling is making sure the cream cheese is completely softened before starting. Cold cream cheese will create lumps that are nearly impossible to smooth out later. Let it sit at room temperature for at least an hour, or cut it into cubes and microwave for 15-20 seconds. Beat the cream cheese and peanut butter together first until completely smooth, scraping down the sides of the bowl frequently.
Add the powdered sugar gradually and beat until the mixture is light and fluffy, about 2-3 minutes. Then gently fold in the Cool Whip by hand or on the lowest mixer setting. Overmixing at this stage will deflate the whipped topping and make the filling dense. The final texture should be pillowy and light but still rich enough to hold its shape when sliced.
Choosing the right peanut butter makes all the difference
Regular creamy peanut butter works best for this recipe, not the natural kind that separates. Brands like Jif, Skippy, or store brands that contain stabilizers will give the smoothest results. Natural peanut butter can make the filling grainy and may cause it to separate over time. The oils in natural peanut butter also don’t emulsify as well with the other ingredients, leading to a less stable final product.
Avoid using crunchy peanut butter unless everyone eating the pie specifically loves chunks. The smooth, creamy texture is part of what makes this pie so appealing to kids and adults alike. If someone really wants peanut pieces, it’s better to add chopped roasted peanuts as a garnish on top rather than using crunchy peanut butter throughout the entire filling.
Storage tricks that keep it fresh for days
This pie actually gets better after sitting in the refrigerator overnight. The filling firms up perfectly and all the components meld together. Store it covered with plastic wrap, but be careful not to let the wrap touch the surface of the pie or it will stick and ruin the smooth top. Instead, use toothpicks around the edges to keep the plastic wrap elevated above the pie.
For longer storage, this pie freezes beautifully for up to three months. Wrap it tightly in several layers of plastic wrap, then aluminum foil. When ready to serve, thaw it overnight in the refrigerator. The texture will be just as good as fresh. Individual slices can also be wrapped and frozen separately, making it easy to grab a single serving whenever a peanut butter craving hits. Let frozen slices thaw for about 10 minutes before eating.
Creative variations that change everything
Once you master the basic recipe, there are endless ways to customize it. Swirl in some raspberry or strawberry jam for a PB&J version. Add mini chocolate chips throughout the filling, or drizzle melted chocolate over the top in decorative patterns. Some people love adding a layer of hot fudge on the bottom of the crust before adding the peanut butter filling.
For the crust, try using Nutter Butter cookies instead of Oreos for double peanut butter impact. Graham cracker crust works well too and gives a more traditional pie experience. Crushed pretzels mixed with butter create a salty-sweet crust that’s absolutely incredible with the peanut butter filling. Even vanilla wafers or chocolate graham crackers make excellent alternative crusts.
Serving tips that make it look professional
Clean slicing is the key to making this pie look bakery-perfect. Use a large, sharp knife and wipe it clean between each cut. Dipping the knife in warm water and wiping it dry also helps create clean cuts through the dense filling. Cut straight down rather than using a sawing motion, which can drag the filling and create messy slices.
For extra wow factor, top each slice with a dollop of whipped cream and a drizzle of chocolate syrup just before serving. Chopped Reese’s peanut butter cups, crushed peanuts, or even a few whole peanuts make great garnishes. A light dusting of cocoa powder around the plate edge makes it look like something from a fancy restaurant. The presentation details really make a difference in how impressed people will be.
Common mistakes that ruin the whole thing
The biggest mistake people make is not letting the pie set long enough. Three to four hours minimum in the refrigerator is essential for proper slicing. Trying to cut it too soon results in a mess that falls apart on the plate. If you’re in a real hurry, the freezer works faster, but the refrigerator gives better final texture.
Another common error is overmixing the filling once the Cool Whip is added. This deflates all the air and creates a dense, heavy pie instead of the light, fluffy texture that makes this recipe special. Also, never try to double the recipe in one bowl – the mixture gets too heavy to fold properly. It’s better to make two separate pies if feeding a large crowd. Using a bowl that’s too small makes proper mixing nearly impossible.
Why this beats store-bought every single time
Store-bought peanut butter pies often have artificial peanut butter that tastes nothing like the real thing. They’re also loaded with preservatives and stabilizers that create a weird, plasticky mouthfeel. Making it at home means controlling exactly what goes in, and the difference in taste is dramatic. Plus, homemade costs about half what a decent store-bought pie runs.
The freshness factor can’t be beaten either. This pie is best within the first few days of making it, when all the components are at their peak. Store-bought pies might have been sitting around for weeks before hitting the shelf. There’s also something satisfying about people being amazed that something so delicious was made so easily. Most people assume incredible desserts require hours of work, so they’re always shocked when they learn how simple this really is.
This no-bake peanut butter pie proves that some of the best recipes are also the simplest ones. With just 20 minutes of prep time and a few hours of chilling, anyone can create a dessert that rivals expensive bakery pies. The combination of convenience, incredible taste, and foolproof technique makes this a recipe worth keeping forever.
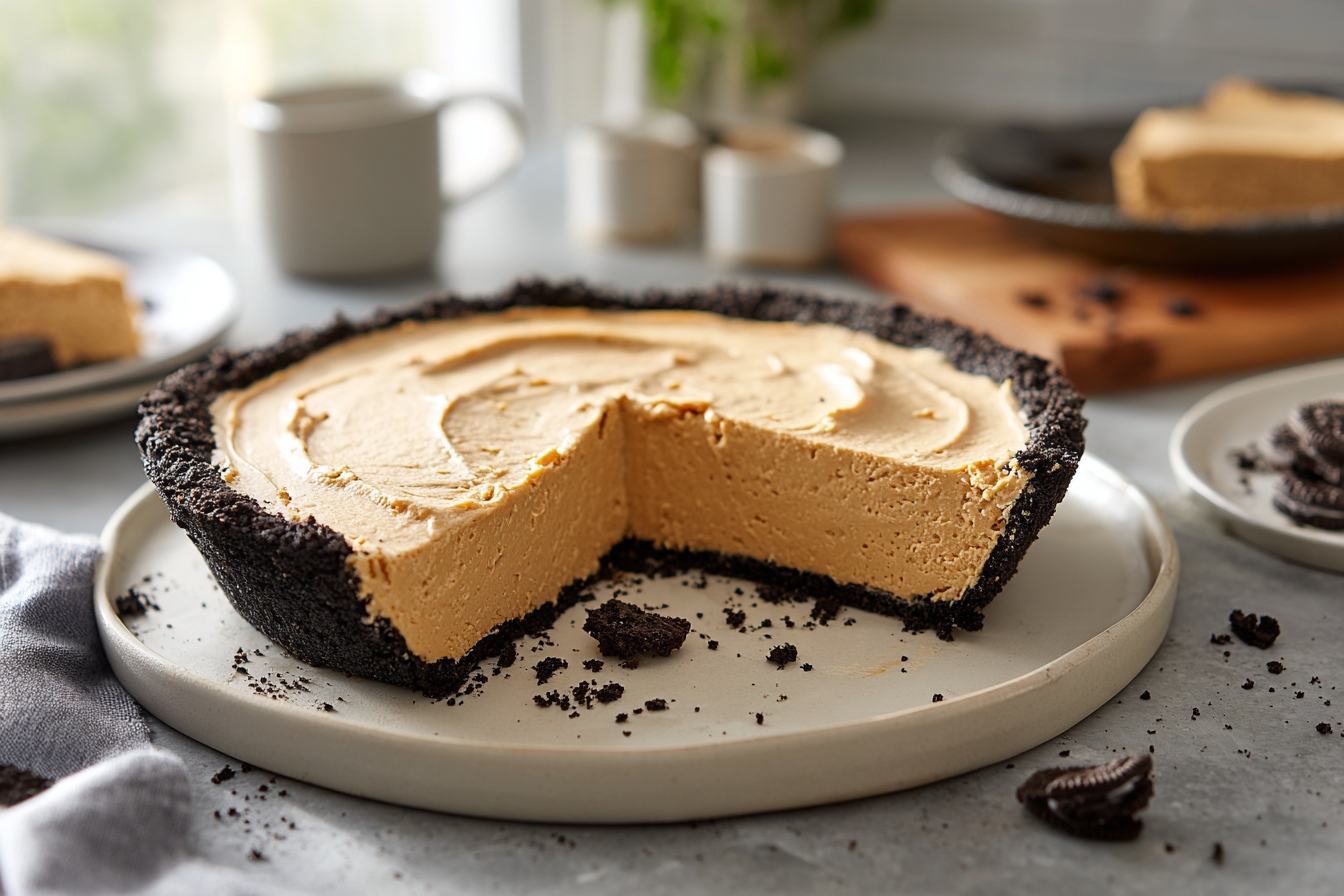
Easy 20-Minute No-Bake Peanut Butter Pie
Course: Dessert10
servings20
minutes450
kcalA ridiculously simple no-bake peanut butter pie with an Oreo crust and fluffy peanut butter filling that tastes like it came from a fancy bakery.
Ingredients
1 cup creamy peanut butter
8 ounces cream cheese, softened
1 cup powdered sugar
8 ounces Cool Whip, thawed
30 Oreo cookies, whole
6 tablespoons butter, melted
1 teaspoon vanilla extract (optional)
Directions
- Place Oreo cookies in a food processor and pulse until they form fine crumbs. Add melted butter and pulse until the mixture holds together when squeezed. Press firmly into bottom and up sides of a 9-inch pie plate using the bottom of a measuring cup.
- Freeze the crust for 20-30 minutes while preparing the filling. This prevents the crust from getting soggy and makes for cleaner slicing later.
- In a large mixing bowl, beat the softened cream cheese and peanut butter together until completely smooth, about 2 minutes. Scrape down the sides of the bowl frequently to ensure no lumps remain.
- Gradually add the powdered sugar and vanilla extract, beating until the mixture is light and fluffy, about 2-3 minutes. The mixture should be noticeably lighter in color and increased in volume.
- Gently fold in the Cool Whip using a large spoon or rubber spatula, or beat on the lowest mixer setting just until combined. Do not overmix as this will deflate the whipped topping and create a dense filling.
- Pour the filling into the chilled Oreo crust and smooth the top with a spatula. Cover gently with plastic wrap, using toothpicks around the edges to keep the wrap from touching the surface.
- Refrigerate for at least 3-4 hours or until completely set. The pie can be made up to 2 days ahead and stored in the refrigerator.
- To serve, use a large sharp knife dipped in warm water and wiped clean between cuts for the neatest slices. Garnish with whipped cream, chocolate drizzle, or chopped peanuts if desired.
Notes
- Use regular creamy peanut butter, not natural or crunchy varieties for best texture
- Make sure cream cheese is completely softened to avoid lumps in the filling
- Pie can be frozen for up to 3 months – thaw overnight in refrigerator before serving
- For cleaner slicing, chill the pie overnight before cutting
Frequently asked questions
Q: Can I use homemade whipped cream instead of Cool Whip?
A: You can, but the texture won’t be quite the same. Cool Whip has stabilizers that help the pie hold its shape better. If using homemade whipped cream, add a packet of unflavored gelatin dissolved in water to help it set properly.
Q: How long does this pie last in the refrigerator?
A: The pie will stay fresh for up to 4-5 days when covered and stored in the refrigerator. It actually gets better after the first day as all the components have time to meld together.
Q: Can I make this pie dairy-free?
A: Yes, substitute vegan cream cheese and use a dairy-free whipped topping. Make sure to check that your chosen peanut butter doesn’t contain any dairy ingredients as well.
Q: Why is my pie filling too soft to slice?
A: The most common cause is not chilling long enough or using cream cheese that wasn’t properly softened before mixing. Make sure to chill for at least 4 hours, and next time ensure your cream cheese is room temperature before starting.