 (1)")

Nothing beats that perfect milkshake moment when everything comes together just right. The creamy texture, the balanced sweetness, and that satisfying thickness that doesn’t turn into soup after five minutes. Most people think making a great milkshake is as simple as throwing ice cream and milk in a blender, but there’s actually a science to getting that perfect consistency and rich taste that rivals your favorite diner.
Getting the ice cream to milk ratio wrong
The biggest mistake people make is eyeballing the proportions without understanding how different ice creams behave. Premium ice creams have more fat content and will create a richer, thicker shake, while lighter versions need less milk to achieve the same consistency. The golden ratio that actually works is roughly 3 parts ice cream to 1 part milk, but this changes based on your ice cream’s quality and how thick you want your final product.
Temperature plays a huge role too – ice cream straight from the freezer will fight against your blender and create an uneven texture. Let your ice cream sit out for about 5 minutes before blending, which allows it to soften just enough to incorporate smoothly with the milk. Professional techniques always account for this softening period, which is why diner milkshakes always seem to have that perfect consistency.
Using the wrong type of milk
Whole milk is absolutely essential for a proper milkshake, and using anything with lower fat content will leave you with a watery, disappointing drink. The fat content in whole milk works with the ice cream to create that rich, creamy texture that makes milkshakes so satisfying. Skim milk or even 2% milk just doesn’t have the body needed to support the ice cream properly.
Some people try to substitute with alternatives like almond milk or oat milk, but these require completely different ratios and techniques to work properly. If you’re committed to using alternative milks, oat milk comes closest to replicating the creamy texture of whole milk, but you’ll need to use less liquid overall. Heavy cream mixed with regular milk can actually create an even richer base, using about 1/4 cup cream to 3/4 cup whole milk for an ultra-luxurious shake.
Over-blending and destroying the texture
The temptation to keep blending until everything is perfectly smooth actually works against you. Over-blending introduces too much air into the mixture, creating a foamy, thin consistency instead of that dense, spoonable texture that defines a great milkshake. The key is to pulse the blender in short bursts, checking the consistency between each pulse until everything just comes together.
Most home blenders are actually too powerful for milkshakes, so using the lowest speed setting and working in stages prevents the mixture from becoming too thin. Start with just a few seconds of blending, then use a spoon to push down any chunks before giving it another short pulse. This method keeps the shake thick and prevents that disappointing moment when your perfectly thick mixture suddenly turns into flavored milk.
Choosing the wrong vanilla ice cream
Not all vanilla ice creams are created equal, and the type you choose will make or break your milkshake. French vanilla typically has a richer, more custardy base that creates incredibly smooth shakes, while regular vanilla can sometimes taste flat when diluted with milk. Premium brands like Häagen-Dazs or Ben & Jerry’s have higher fat content and real vanilla, which translates to better consistency and more complex taste.
Store brands often use artificial vanilla and more air in their ice cream, which means your shake will lack that rich, creamy quality that makes the difference between good and amazing. Look for ice creams with simple ingredient lists – cream, milk, sugar, eggs, and real vanilla extract or vanilla beans. The investment in quality ice cream pays off immediately in the final product, creating a shake that tastes like it came from an upscale ice cream shop.
Skipping the malt powder game changer
Malt powder is the secret ingredient that transforms a regular milkshake into something special, adding a subtle nutty, caramel-like complexity that vanilla alone can’t achieve. Most people have never even tried adding malt powder to their homemade shakes, but it’s what gives classic diner milkshakes their distinctive, nostalgic taste. Just 2 tablespoons of malt powder mixed with your ice cream and milk creates an entirely different drinking experience.
Carnation and Horlicks are the most commonly available malt powders, and they’re usually found in the baking aisle or near the hot chocolate mixes. The powder dissolves completely when blended, so there’s no gritty texture, just that rich, slightly sweet complexity that makes people wonder what makes your milkshakes taste so much better than everyone else’s. Classic milkshake recipes from the 1950s almost always included malt powder as a standard ingredient.
Forgetting about proper glass preparation
Chilled glasses make a huge difference in how your milkshake tastes and how long it maintains its perfect consistency. Room temperature glasses will immediately start melting your carefully crafted shake, while glasses that have been in the freezer for at least 30 minutes help maintain that thick, creamy texture longer. The cold glass also prevents condensation from forming on the outside, which keeps your hands dry and the presentation clean.
Tall, narrow glasses work better than wide ones because they minimize the surface area exposed to warm air, keeping your shake colder longer. Mason jars have become popular for milkshakes, and they actually work great because the thick glass holds the cold temperature well. Some people even rinse their glasses with cold water and stick them in the freezer while they’re making the shake, which only takes a few extra minutes but makes a noticeable difference.
Missing the perfect topping balance
Whipped cream is almost mandatory on a proper milkshake, but most people either skip it entirely or go overboard with the canned stuff. Real whipped cream made from heavy cream, a little sugar, and vanilla extract takes just two minutes with a hand mixer and tastes infinitely better than anything from a can. The key is whipping it just to soft peaks – over-whipped cream becomes grainy and doesn’t complement the smooth shake texture.
A maraschino cherry on top isn’t just for looks – it provides a little burst of sweetness and acidity that balances the rich cream and vanilla. Some people add a drizzle of chocolate syrup or caramel sauce, but these should be used sparingly so they don’t overpower the vanilla base. Crushed cookies, sprinkles, or even a small piece of vanilla wafer can add texture contrast without competing with the main event.
Serving with the wrong equipment
A proper milkshake needs both a straw and a spoon, but most people only provide one or the other. The thick consistency of a well-made shake means regular straws won’t work – you need wide smoothie straws or the classic red-and-white striped milkshake straws. These wider straws let you actually drink the shake instead of just struggling to suck up tiny amounts while the rest melts.
Long spoons are equally important because the best milkshakes are thick enough to eat with a spoon, especially at the beginning. Ice cream shops always provide both because they know a proper shake starts thick enough to spoon and gradually becomes thin enough to drink. Having both options lets people enjoy the shake exactly how they prefer, whether they want to savor it slowly with a spoon or drink it through a straw.
Timing the serving completely wrong
Milkshakes have a very narrow window of perfect consistency, and most people either serve them too thick or wait too long and serve them too thin. The ideal shake should be thick enough that it doesn’t immediately slide down the glass when you tip it, but not so thick that it’s impossible to drink. This usually happens about 2-3 minutes after blending, giving the mixture time to settle but not enough time to start melting significantly.
If your shake is too thick after blending, add milk one tablespoon at a time and pulse briefly rather than adding a lot at once. If it’s too thin, add more ice cream in small amounts. The key is making these adjustments quickly and serving immediately once you hit that perfect consistency. Room temperature affects everything, so on hot days, work faster and consider chilling your blender pitcher in the freezer for a few minutes before starting.
Making the perfect milkshake isn’t rocket science, but it does require attention to the details that most people overlook. From choosing quality ingredients to timing the serving just right, each step contributes to that amazing shake that makes people ask for your secret. Once you master these techniques, you’ll never settle for a mediocre milkshake again.
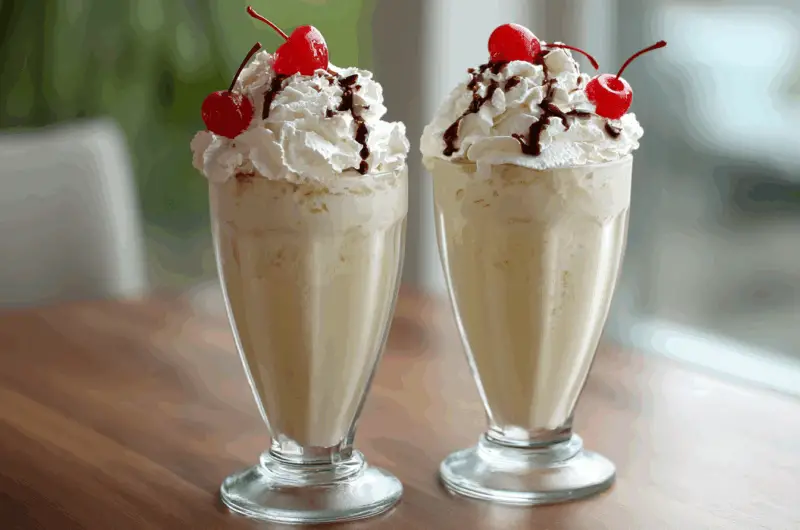
Perfect Vanilla Milkshake
Course: Dessert2
servings10
minutes380
kcalThis classic vanilla milkshake recipe delivers the perfect creamy, thick consistency with rich vanilla taste that rivals any ice cream shop.
Ingredients
4 cups premium vanilla ice cream, slightly softened
1 cup whole milk, cold
2 tablespoons malt powder (optional)
1 teaspoon pure vanilla extract
1 cup heavy cream for whipped topping
2 tablespoons powdered sugar
1/2 teaspoon vanilla extract for whipped cream
2 maraschino cherries
Chocolate syrup for drizzling (optional)
Directions
- Place two tall glasses in the freezer for at least 30 minutes before serving. This helps maintain the shake’s thick consistency and prevents immediate melting. Remove the vanilla ice cream from freezer and let it sit at room temperature for 5 minutes to soften slightly.
- Add the softened ice cream, cold whole milk, malt powder (if using), and vanilla extract to a blender. Start with the liquid ingredients first, then add the ice cream on top. This order helps the blender work more efficiently and prevents ice cream from sticking to the bottom.
- Blend on the lowest speed setting using short 3-4 second pulses. Check the consistency between pulses and use a spoon to push down any large chunks. Continue pulsing until just combined – the mixture should be thick enough to coat a spoon but still pourable.
- While the milkshake settles, make fresh whipped cream by beating heavy cream, powdered sugar, and vanilla extract with a hand mixer until soft peaks form. Don’t overbeat as this will make the cream grainy and less smooth.
- Test the shake consistency by tilting the blender – it should move slowly but not be completely solid. If too thick, add milk one tablespoon at a time and pulse briefly. If too thin, add more ice cream in small amounts.
- Remove the chilled glasses from the freezer and optionally drizzle chocolate syrup down the inside walls for decoration. Pour the milkshake immediately into the glasses, filling them about 3/4 full to leave room for toppings.
- Top each milkshake with a generous dollop of fresh whipped cream and place a maraschino cherry on top. The whipped cream should be thick enough to hold its shape but light enough to complement the rich shake.
- Serve immediately with both a wide straw and a long spoon. The shake should be thick enough to eat with a spoon initially, then gradually become thin enough to drink through the straw as it slightly warms.
Notes
- Use premium ice cream brands like Häagen-Dazs or Ben & Jerry’s for the best consistency and richness
- Malt powder is optional but adds authentic diner-style depth – find it in the baking aisle near hot chocolate mixes
- Never use skim or low-fat milk as it will create a thin, watery texture that won’t support the ice cream properly
Frequently asked questions
Q: Can I make this milkshake without malt powder?
A: Absolutely! The malt powder adds a classic diner taste but isn’t essential. Your milkshake will still be delicious with just vanilla ice cream, milk, and vanilla extract. You can also substitute with a tablespoon of vanilla syrup if you want extra sweetness.
Q: Why does my milkshake always turn out too thin?
A: This usually happens from using too much milk, over-blending, or using low-quality ice cream with too much air. Try using less milk, blending in short pulses instead of continuously, and investing in premium ice cream with higher fat content.
Q: How do I fix a milkshake that’s too thick to drink?
A: Add cold milk one tablespoon at a time and pulse briefly after each addition. Don’t add too much at once, as it’s easier to thin out a thick shake than to thicken a thin one. Let it sit for a minute or two and it will naturally thin slightly.
Q: Can I make milkshakes ahead of time?
A: Milkshakes are best served immediately, but you can make them up to 30 minutes ahead and store in the freezer. Give them a quick stir before serving, as they may separate slightly. For longer storage, freeze the mixture in ice cube trays and re-blend when ready to serve.